How to Easily Deploy Your Services on AWS EC2

I'm a passionate frontend developer with a knack for crafting immersive user experiences. Over the years, I've honed my skills in ReactJS, MongoDB, Redux, React-Toolkit, and SQL, leveraging these tools to deliver robust and dynamic web applications. I am passionate about explore and learning new things and willing to work beyond my capacity to administer projects. 💼 Currently, Diving deep into MEAN stack
In this article, we will discuss AWS EC2 and how to create and deploy your services on AWS EC2.
Before we get started, I assume you all have an account on the AWS Console.
Prerequisite
An account on AWS Console
An app to deploy
Let’s Start
Deploying a service on an AWS EC2 instance involves several steps. Since you've already created an AWS account, follow the process step-by-step. This assumes your service is ready (e.g., built and tested locally) and you have basic familiarity with AWS and command-line tools. If not, don't worry.
Step 1: Set Up Your EC2 Instance
Log in to AWS Management Console
- Go to the AWS Console, and navigate to the EC2 service (search for "EC2" in the search bar).
Create an Instance
Name and tags: Name of your service.
Application and OS Images (Amazon Machine Image): In image choose Amazon Linux or Ubuntu. By The Way i choose ubuntu.
Choose free tier for practice
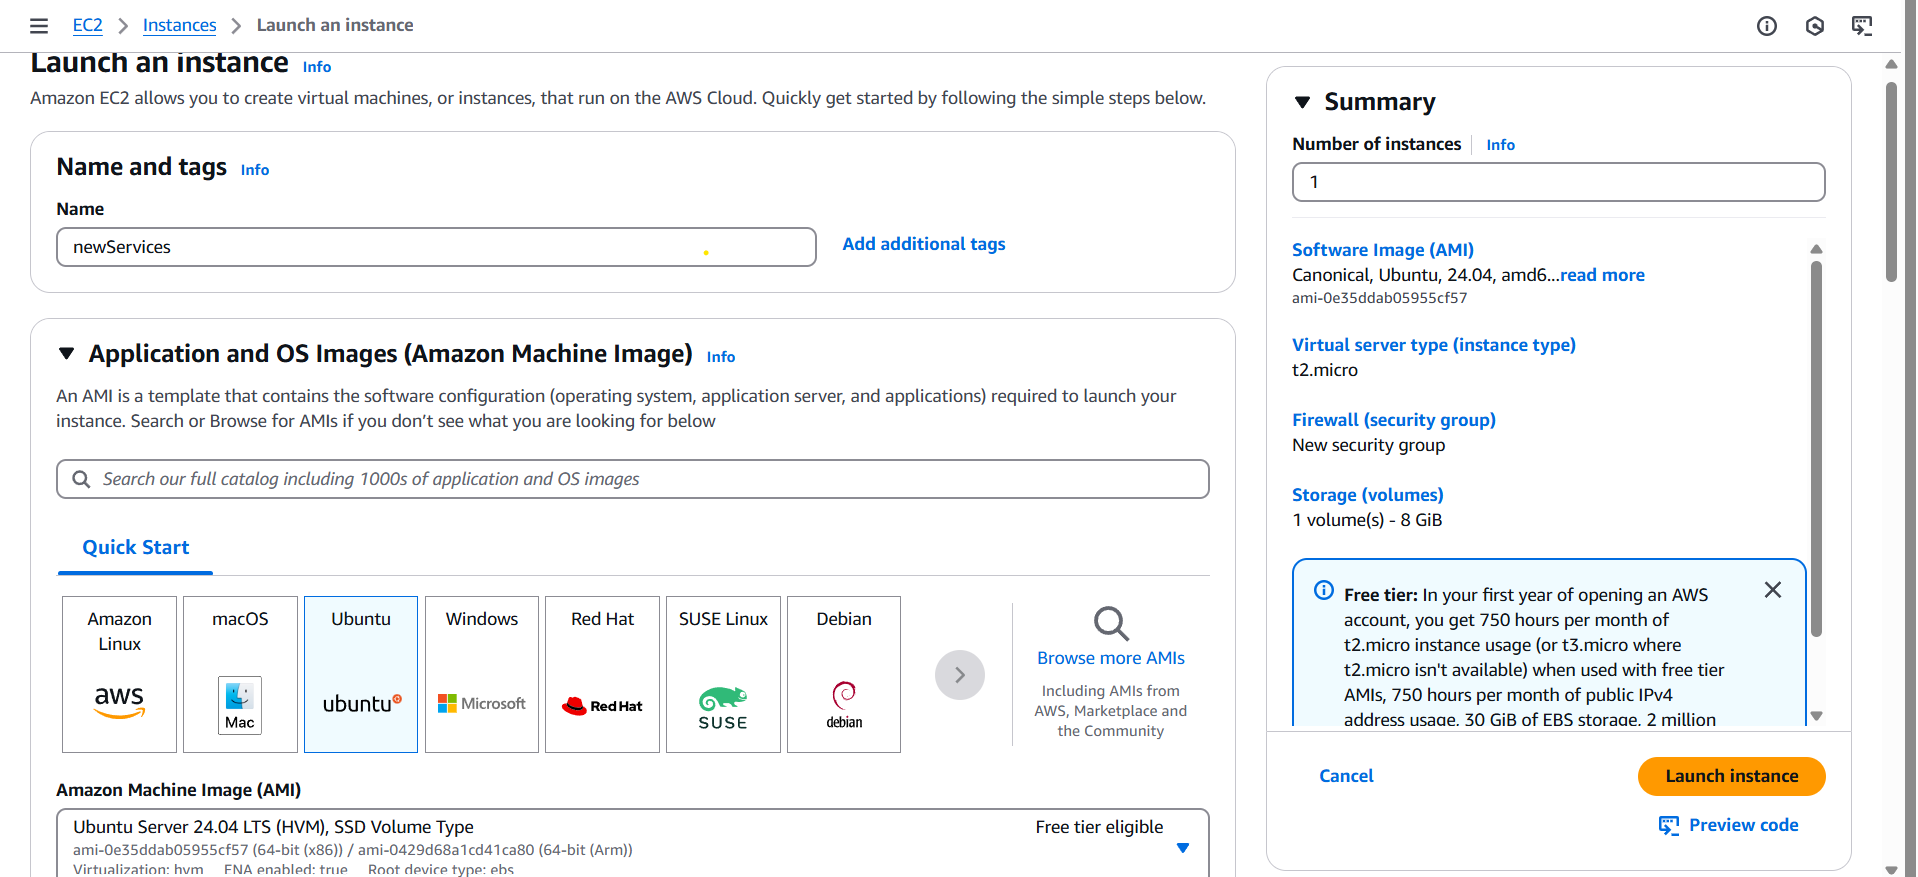
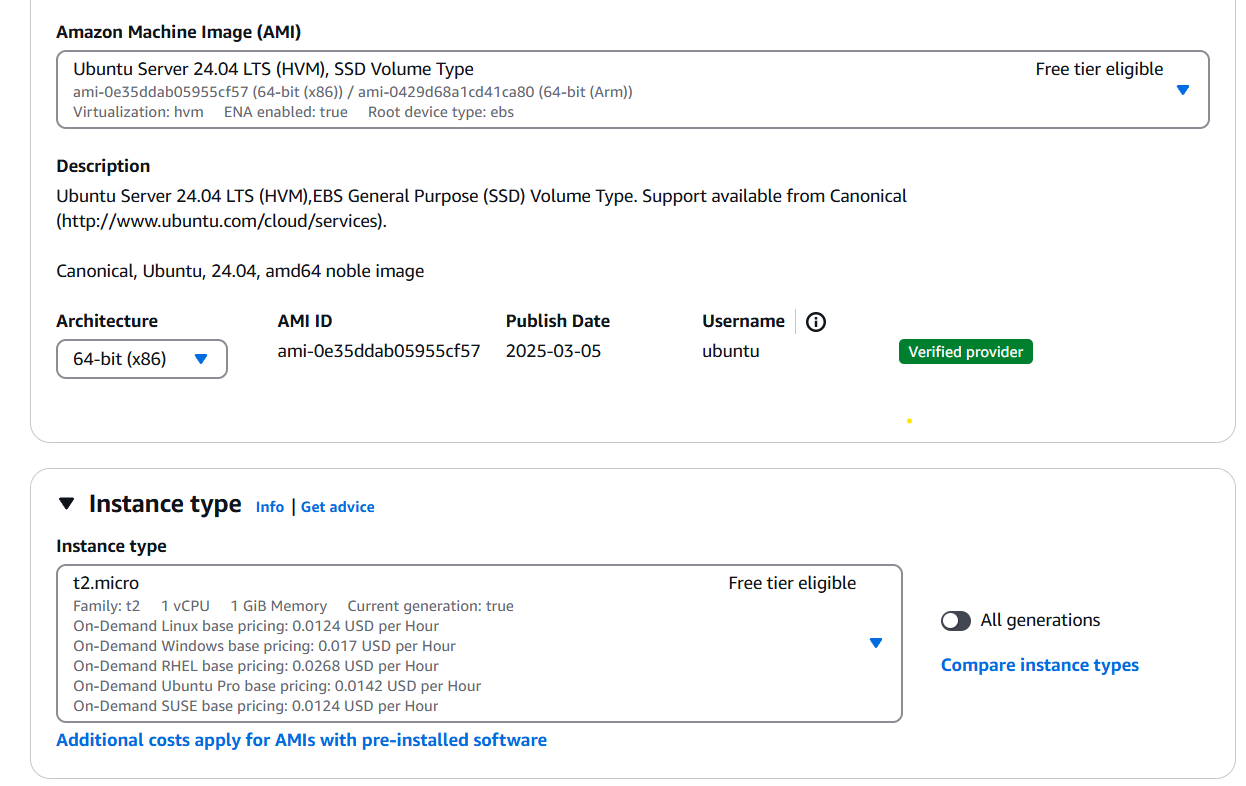
Instance type: t2.micro
Create Key Pair: Give your instance a memorable name or any name you prefer. Choose RSA and .pem. Remember, you cannot access your instance without this key pair.

Network settings: Create Security group and Allow SSH traffic and Allow HTTP traffic from the internet.
Keep the rest of the settings the same, and then launch the instance.
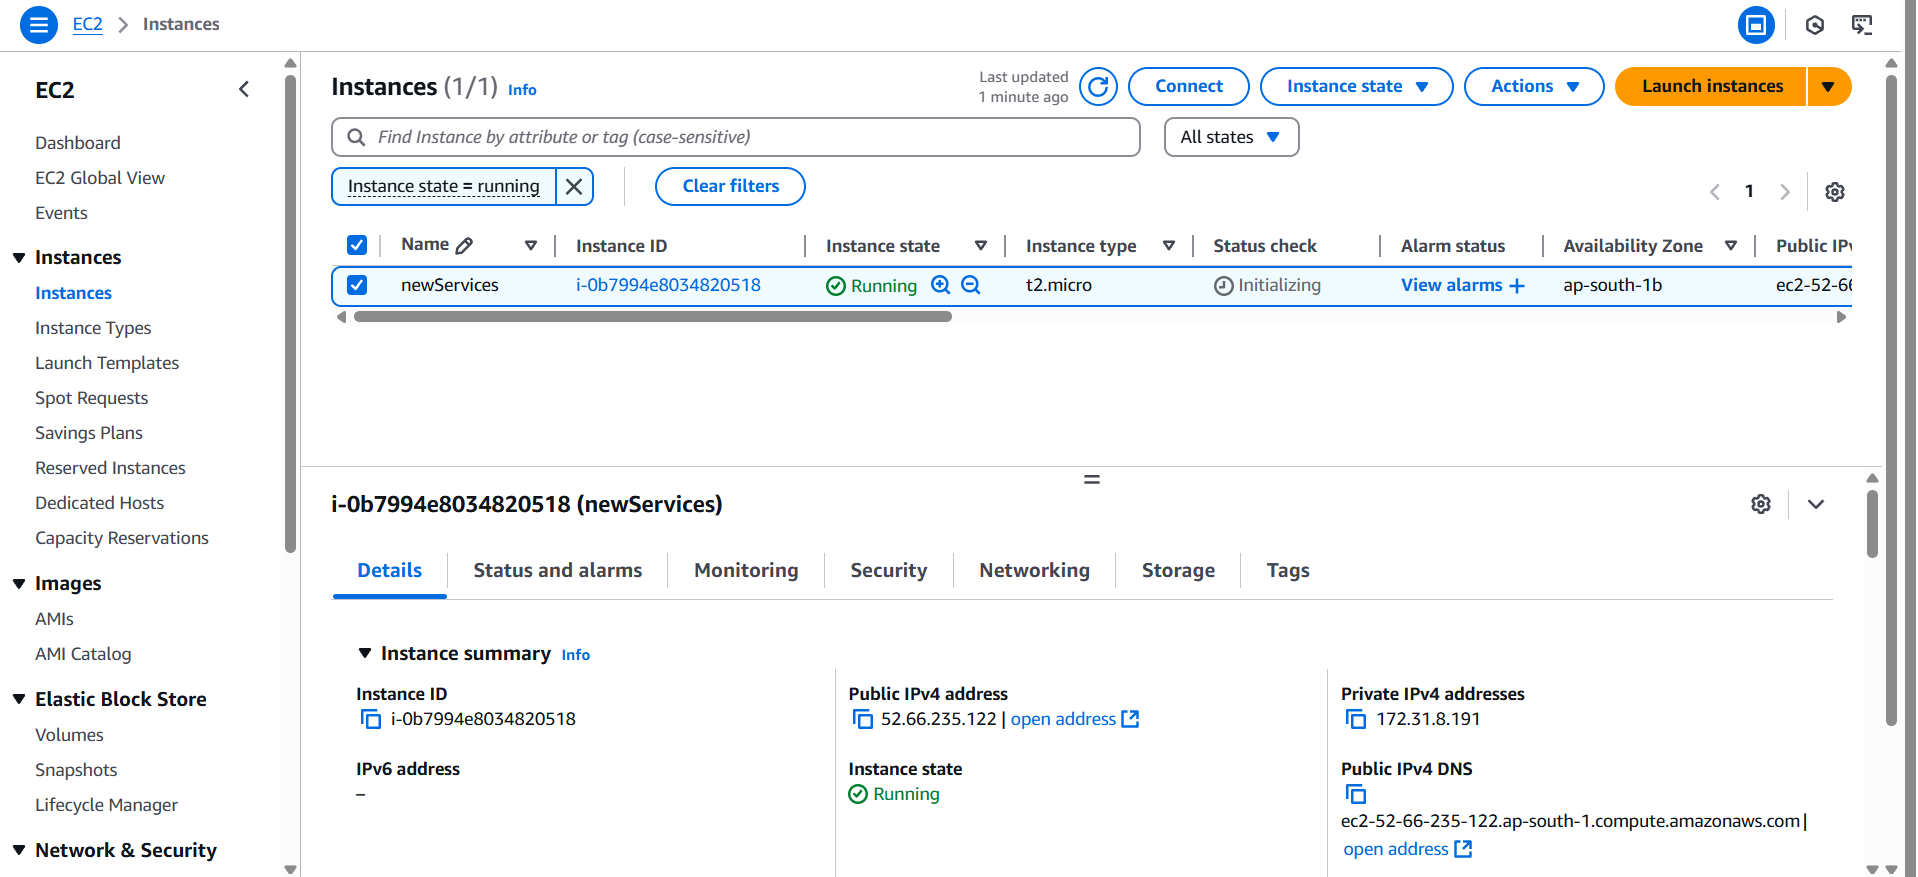
Launch an EC2 Instance
After clicking "Launch Instance," your instances window will show one running instance. Be sure to stop or terminate the instance after testing by selecting the option through the instance state.
Step 2: Connect to Your EC2 Instance
SSH into the Instance
Open a terminal on your local machine.
Run:
ssh -i loopback4-key.pem ubuntu@<public-ip>Replace with your instance’s public IP (e.g., 54.123.45.67). For Amazon Linux 2, use ec2-user instead of ubuntu.
Update the System
Run:
  sudo apt update && sudo apt upgrade -y  # For Ubuntu
  # OR
  sudo yum update -y  # For Amazon Linux
Step 3: Install Node.js and Dependencies
Install Tools
In my app LoopBack 4 requires Node.js (LTS recommended, e.g., 18.x or 20.x).
- For Ubuntu:
    curl -fsSL https://deb.nodesource.com/setup_20.x | sudo -E bash -
    sudo apt install -y nodejs
- For Amazon Linux 2:
    curl -fsSL https://rpm.nodesource.com/setup_20.x | sudo bash -
    sudo yum install -y nodejs
- Verify: node -v and npm -v.
Install Git
- If you plan to clone your repo:
    sudo apt install git -y (Ubuntu)

    sudo yum install git -y (Amazon Linux 2)
- Install other services needed for your app, such as databases and any additional components.
Step 4: Deploy Your LoopBack 4 Microservice
- Transfer Your Code via Git
Option 1: Use Git
Clone your repo:
  git clone <your-repo-url>
  cd <your-repo-folder>
  npm install
SSH back in, then:
  cd ~/app
  npm install
Copy Files from Local Machine to EC2 (via Terminal / SCP)
Prerequisites:
You have your
.pemprivate key.Your local machine has
scporrsyncinstalled.The EC2 instance's security group allows SSH (port 22).
Using scp (Secure Copy):
For ubuntu image:

scp -i /path/to/your-key.pem -r /path/to/your/project-folder ubuntu@your-ec2-ip:/home/ec2-user/
Permissions & Post-Transfer Tips
After uploading, you might want to set permissions:
chmod -R 755 your-folderCheck your Inbound Setting inside EC2 Security group. (Optional) To make your EC2 instance accessible, verify the inbound rules in your Security Group:
If you need open access, you can add a new inbound rule:
Type: All TCP
Port Range: 0–65535
Source: 0.0.0.0/0 (for all IPs)
⚠️ Warning: Allowing all TCP traffic from anywhere (0.0.0.0/0) is a major security risk and should only be used temporarily for testing. It's recommended to restrict access to specific IP addresses or only open required ports (e.g., 22 for SSH, 80/443 for web apps).
- Test your app
npm start
Open a browser or use curl from another terminal:
curl http://<public-ip>:80If it works, stop the app with Ctrl+C.
Of course! Here's an even more fun and casual version:
Conclusion
And that’s it! You’ve just deployed your service on AWS EC2, and it wasn’t as scary as it seemed, right? 🎉 It’s like learning to ride a bike — once you get the hang of it, you’ll be zooming down the cloud highway in no time. 🚴♂️💨
With EC2, you’ve got a powerful tool in your hands to host your app, scale it up when things go wild, and even scale it down when you're feeling lazy. (We all have those days.) 😎 And hey, AWS isn’t going to judge you for taking a nap while your services run smoothly in the background. 😴
So go ahead, launch that app, pop a celebratory snack, and give yourself a high-five for being a cloud wizard. 🧙♂️🚀 You’ve got this!
Make sure you terminate your EC2 instance or stop it. Otherwise, AWS may charge you.


